Save
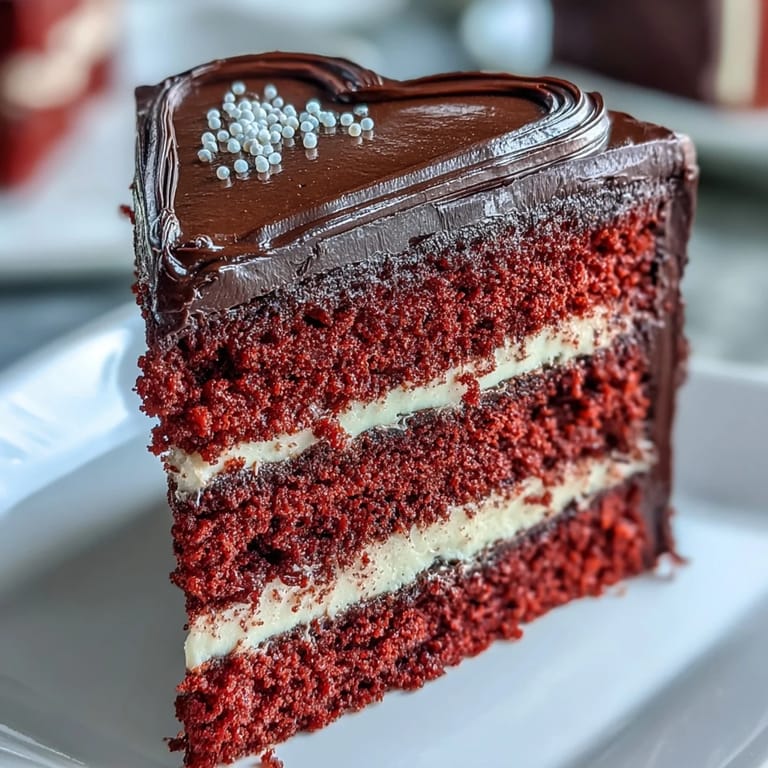
Save The first time I attempted a red velvet cake with a dark chocolate silhouette, I accidentally traced the design backward and ended up with a Betty Boop facing the wrong direction. My sister still claims that backward Betty was the best version I've ever made. Since then, I've learned that the contrast between that vivid red crumb and bittersweet chocolate creates something almost cartoonishly perfect, like dessert decided to dress up for a party.
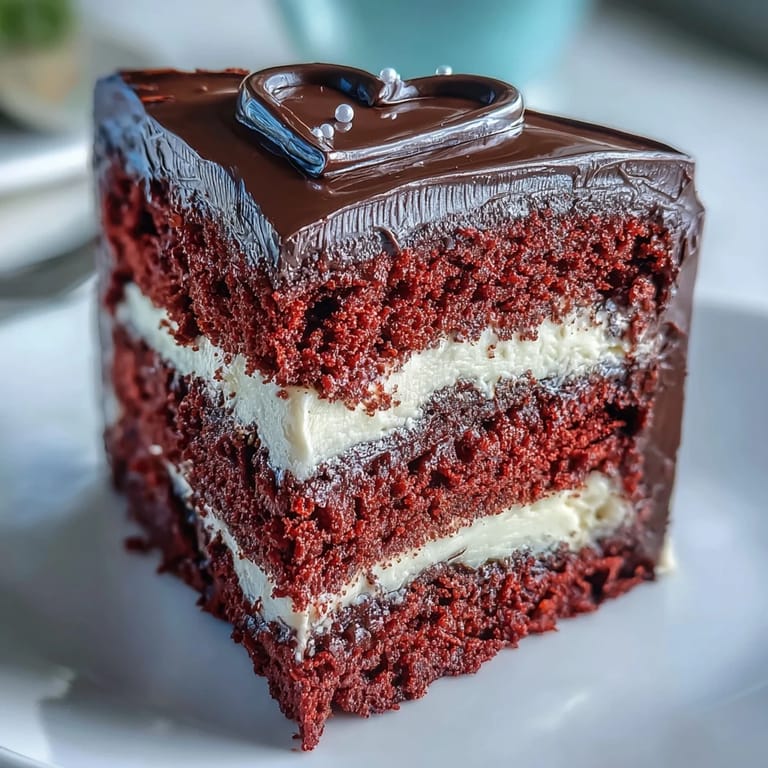
I made this for my niece's birthday last February, and she whispered that it looked like something from a fancy bakery window. The way the dark chocolate Betty Boop pops against that coral-red frosting is genuinely striking. Kids and adults both lean in closer when they see the silhouette sitting there like edible art.
Ingredients
- Cake flour: The lower protein content keeps the crumb tender and soft, which is exactly what red velvet needs
- Natural cocoa powder: Just enough to deepen the flavor without overpowering that classic red velvet taste
- Room temperature ingredients: This is non-negotiable for proper emulsion and even baking
- Red gel coloring: Liquid coloring will thin your batter and affect the texture
- Double vinegar trick: The first tablespoon enhances the red color, the second activates baking soda for lift
- Cream cheese frosting: The tangy, creamy partner that makes red velvet sing
- Dark chocolate: Use at least 60% cacao for a silhouette that won't melt too quickly and offers bitter contrast
Tired of Takeout? 🥡
Get 10 meals you can make faster than delivery arrives. Seriously.
One email. No spam. Unsubscribe anytime.
Instructions
- Get your pans ready:
- Grease those heart-shaped pans thoroughly and line the bottoms with parchment circles. The heart shape can stick in the corners more than round pans, so be generous with your nonstick spray or butter.
- Whisk the dry team:
- In a medium bowl, combine cake flour, cocoa powder, baking powder, baking soda, and salt. Sifting your flour first prevents lumps and makes the crumb finer.
- Cream butter and sugar:
- Beat butter for a full minute before adding sugar, then cream them together for 2-3 minutes until pale and fluffy. This step creates the tender texture that makes red velvet so famous.
- Add eggs one by one:
- Beat each egg completely before adding the next. Scrape down the bowl sides every time to ensure everything incorporates evenly.
- Make it red:
- Mix in red gel coloring, vanilla, and the first tablespoon of white vinegar. Watch the batter transform into that signature shade that makes red velvet unmistakable.
- Alternate wet and dry:
- Add ingredients in thirds, starting and ending with flour mixture. Mix only until just incorporated, overmixing will make your cake tough.
- The secret fizz:
- Stir baking soda with the second teaspoon of vinegar and fold it gently into the batter. It will foam slightly, which creates those tiny air pockets for a light crumb.
- Bake until just done:
- Divide batter between prepared pans and bake for 25-30 minutes. A toothpick should come out clean, but the cake will continue cooking slightly as it cools.
- Cool completely:
- Let cakes rest in pans for 10 minutes before turning them onto wire racks. Warm cake will melt your frosting, so patience here saves you later.
- Make the frosting:
- Beat cream cheese and butter until smooth, then gradually add powdered sugar. This frosting is sturdy enough to hold the silhouette but creamy enough to swoon over.
- Assemble with confidence:
- Frost between layers, apply a crumb coat, and chill for 10 minutes. The cold crumb coat locks in loose crumbs so your final layer stays perfectly smooth.
- Final frosting layer:
- Add the remaining frosting and smooth with an offset spatula. Create swirls or leave it pristine, your choice.
- Create the silhouette:
- Place your Betty Boop stencil under parchment paper and trace with melted dark chocolate. Chill until completely set, then peel carefully from the parchment.
- The grand placement:
- Position the chocolate silhouette on the cake center and press gently. The chocolate should adhere to the frosting without cracking.
- Final touches:
- Add frosting rosettes or edible glitter around the edges. Chill for 30 minutes before slicing with a warm knife for clean cuts.
 Save
Save Last Valentine's Day, I made three of these for different friends. Each one of them sent me a photo of the empty plate with just that dark chocolate outline remaining, like Betty Boop was winking at them from their dessert plates. That silhouette really does make people pause before they dive in.
Making The Silhouette Foolproof
Print your Betty Boop stencil to the exact size you want, then slip it under parchment paper. Pipe or brush the melted chocolate slowly, working in small sections. Let the chocolate set completely at room temperature before attempting to move it. Rushing this step is how you end up with broken Betty arms.
Perfecting Red Velvet Color
Natural cocoa contains anthocyanins that react with vinegar and buttermilk to enhance red tones. The science helps, but you still need that gel coloring to get the vivid ruby red people expect. Start with less than you think you need, you can always add more but you cannot take it back.
Frosting Like A Pro
Run your offset spatula under hot water and dry it thoroughly before smoothing the final frosting layer. The warmth helps glide over any imperfections. Work quickly though, because warm spatula on cold frosting can create drag marks if you hesitate.
- Chill your cake board or plate before assembly to prevent sliding during frosting
- Keep a small bowl of warm water nearby to clean your spatula between passes
- Touch up any mistakes with a clean spatula dipped in hot water
 Save
Save There is something joyful about cutting into a heart-shaped cake and revealing that dramatic contrast inside. This recipe turns dessert into a tiny celebration, no special occasion required.
Questions & Answers
- → What makes the red color so vibrant?
Gel-based food coloring provides the most intense red hue without thinning the batter or affecting the texture. The white vinegar also helps maintain color brightness while activating the baking soda for a lighter crumb.
- → Can I make this cake in advance?
Yes, bake the layers up to 24 hours ahead, wrap tightly in plastic, and store at room temperature. The frosting can be made 2 days ahead and kept refrigerated. Assemble and decorate the day you plan to serve for best results.
- → Why do I need both types of vinegar?
The white vinegar stirred into the batter enhances the red color and contributes to the classic tangy flavor. The distilled white vinegar mixed with baking soda creates a reaction that produces extra lift for a tender, moist crumb.
- → How do I get clean slices without crushing the heart shape?
Chill the completed cake for at least 30 minutes before serving. Use a sharp, warm knife—run it under hot water and wipe dry between slices. Cut with gentle sawing motions rather than pressing down.
- → Can I substitute the dark chocolate silhouette?
White chocolate dyed black with oil-based coloring works well for a brighter contrast. Alternatively, use candy melts in black or create the silhouette with fondant. Avoid water-based food coloring in chocolate as it will seize.