 Save
Save My neighbor's kitchen always smelled like peanut butter on Saturday afternoons, and I finally asked her what she was making. She handed me a still-warm cookie with that perfect crosshatch fork pattern on top, and it was gone in two bites. That moment, standing in her doorway with melted peanut butter on my fingers, I knew I had to learn how she made them taste so impossibly soft and chewy.
I made these for a bake sale last spring, worried they'd sell out too fast or sit there untouched. The plate was empty within an hour, and someone left a note asking for the recipe. That feeling of handing someone a cookie and watching their face light up as they bit into it—that's when I realized these cookies were more than just a recipe.
Ingredients
- All-purpose flour (1 1/4 cups): This is your structure—don't skip it or swap it for anything else, or you'll end up with a greasy mess instead of a cookie.
- Creamy peanut butter (1 cup): This is where the magic lives; use the good stuff with just peanuts and salt, no added oils.
- Unsalted butter (1/2 cup), softened: Softness is key here—if it's cold, your dough will be lumpy and your cookies will spread unevenly.
- Granulated sugar (3/4 cup) and light brown sugar (1/2 cup): The combination gives you both sweetness and chewiness; brown sugar is the secret to that tender center.
- Large egg: One egg binds everything together and adds richness—don't try to skip it.
- Vanilla extract (1 teaspoon): A small amount, but it rounds out the peanut flavor beautifully.
- Baking soda (1/2 teaspoon), baking powder (1/4 teaspoon), and salt (1/4 teaspoon): These lift and balance the dough; too much soda and they'll taste metallic, too little and they'll be dense.
Tired of Takeout? 🥡
Get 10 meals you can make faster than delivery arrives. Seriously.
One email. No spam. Unsubscribe anytime.
Instructions
- Prepare your stage:
- Preheat to 350°F and line two baking sheets with parchment. This gives you a clean surface and prevents sticking, plus you can slide the whole sheet onto a cooling rack later.
- Mix the dry team:
- Whisk flour, baking soda, baking powder, and salt in a bowl and set aside. This prevents lumps and ensures the leavening is evenly distributed throughout your dough.
- Cream the butter and sugars:
- Beat softened butter with both sugars until light and fluffy, about 2 minutes. You're incorporating air here, which helps the cookies rise slightly and stay tender.
- Add egg and vanilla:
- Mix in the egg and vanilla until fully combined. The dough will look a bit loose now, which is exactly right.
- Stir in the peanut butter:
- Add the creamy peanut butter to the wet mixture and fold until it's completely blended. This step can feel a bit resistant—keep going until there are no streaks.
- Fold in dry ingredients:
- Add the flour mixture gradually, stirring just until no white flour streaks remain. Overmixing toughens the cookies, so stop as soon as everything is combined.
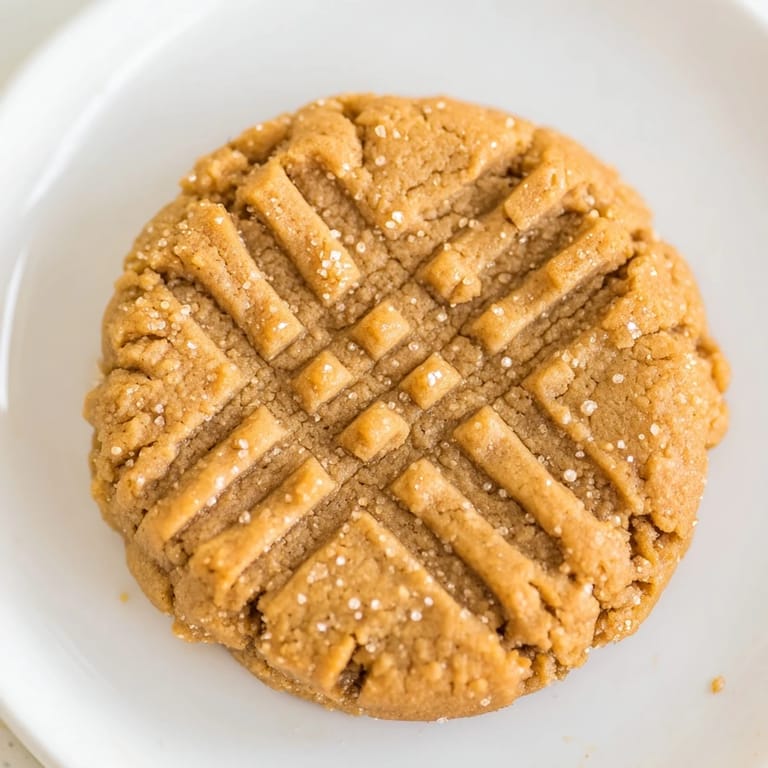
- Shape with intention:
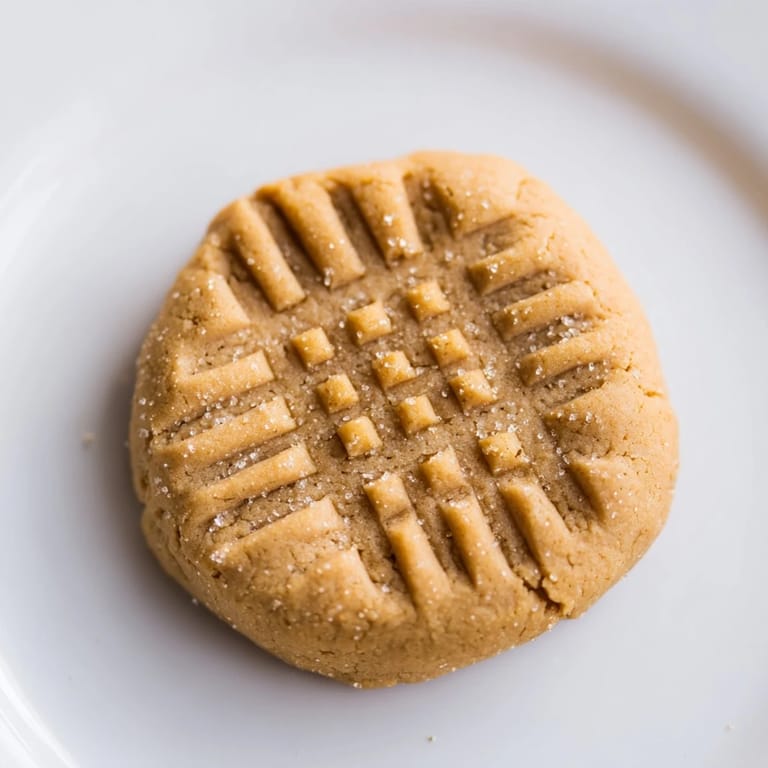
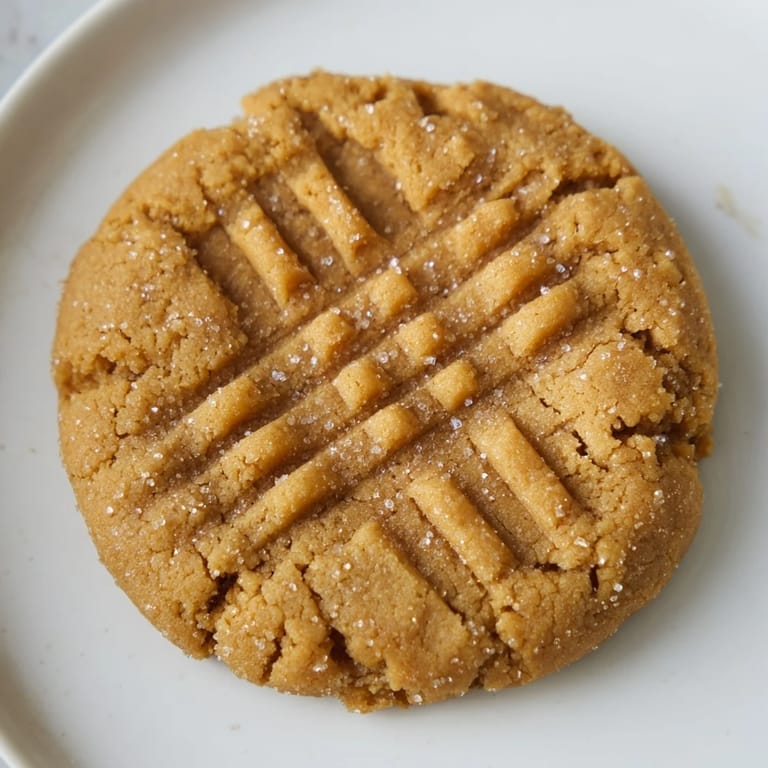
- Scoop a tablespoon of dough into a ball, then press twice with a fork in a crisscross pattern. The crosshatch isn't just pretty—it helps the cookies bake evenly and signals they're homemade.
- Bake until golden:
- Bake 10 to 12 minutes until the edges are lightly golden but the centers still look slightly underbaked. They'll continue cooking on the hot sheet for a minute after you pull them out.
- Cool with patience:
- Let them sit on the baking sheet for 5 minutes, then move to a wire rack. This resting period is crucial—they set just enough to hold together but stay chewy inside.
 Save
Save My daughter took one to show-and-tell and told the whole class I made them from scratch. That night at dinner, she asked if we could make them together every month. I realized then that these cookies had become our thing, a way we spend time together without it feeling like an obligation.
The Crosshatch Story
I spent my first attempt trying to use the back of a spoon to flatten the dough, and they turned out lumpy and uneven. Then I tried a fork and discovered the crosshatch isn't just decoration—it actually helps them bake more evenly by giving the dough somewhere to expand. The fork pattern also signals that someone cared enough to make them properly, which is half the battle when you're sharing food with people you love.
Timing and Temperature Matter More Than You'd Think
A cold kitchen gives you different results than a warm one, and I learned this the hard way on a humid summer afternoon when my first batch came out flat and greasy. Now I bake early in the day or late in the evening when the air is cooler, and the dough stays together properly. Temperature consistency is genuinely the difference between cookies that stay on your plate and cookies that turn into a puddle.
Making Them Your Own
The beauty of this recipe is that it's sturdy enough to handle variations without completely falling apart. I've swapped in chunky peanut butter for nuttiness, added chocolate chips when I had them, and even pressed a few Reese's pieces on top before baking just to see what would happen. Every version still tastes like those cookies my neighbor made, just with a personal twist.
- Try mixing in chocolate chips, chopped peanuts, or even a sprinkle of sea salt on top before baking.
- Chunky peanut butter adds texture if you like a little resistance when you bite down.
- If you want them crunchier, add 1 to 2 minutes to the baking time and watch closely.
 Save
Save These cookies remind me that baking is really just paying attention—to temperatures, timing, and the small moment when something raw becomes something warm and shareable. Pour yourself a cold glass of milk or coffee and take a bite while they're still slightly warm.
Questions & Answers
- → How do I achieve the signature crosshatch pattern?
After rolling dough balls, press each down twice with a fork in perpendicular directions to create the classic crisscross design.
- → Can I make these cookies crunchier?
Baking an extra 1-2 minutes will produce a crispier texture while keeping a slight chewiness inside.
- → Is there a way to add texture variations?
Try mixing in chunky peanut butter, chocolate chips, or chopped peanuts for added crunch and flavor.
- → What is the best way to store these cookies?
Store in an airtight container at room temperature for up to a week to maintain softness and freshness.
- → Are these suitable for a vegetarian diet?
Yes, these treats contain no meat or gelatin and fit vegetarian preferences.